How To Backup And Restore ElasticSearch
Cluster using Snapshot
(in Kibana)
Summery
- Config ElasticSearch
- Installing NFS
- Create Repository
- Create Policy
- Take a Snapshot
- Restore Snapshot
------------
Config ElasticSearch
There are 3 Nodes of ElasticSearch
192.168.195.136
192.168.195.137
192.168.195.138
: For each node
Create directory for the storing location of the snapshot
/   cd
   mkdir /BackupES
   chown -R elasticsearch:elasticsearch /BackupES
Note (important)
The directory must be shared between servers, You can use the NFS method
Installing NFS
:IP
NFS Server : 192.168.195.136
NFS Client : 192.168.195.137
NFS Client : 192.168.195.138
Configure the Firewall (For each node )
yum -y install firewalld
Then
systemctl start firewalld.service
systemctl enable firewalld.service
firewall-cmd --permanent --zone=public --add-service=ssh
firewall-cmd --permanent --zone=public --add-service=nfs
firewall-cmd --reload
Installing NFS (For each node )
yum -y install nfs-utils
Then
systemctl enable nfs-server.service
systemctl start nfs-server.service
Create directory and change permission (For each node)
chown nfsnobody:nfsnobody /BackupES
chmod 755 /BackupES
192.168.195.136
vi /etc/exports
BackupES            192.168.195.137(rw,sync,no_root_squash,no_subtree_check)/
BackupES            192.168.195.138(rw,sync,no_root_squash,no_subtree_check)/
exportfs -arv
192.1658.195.137
vi /etc/exports
/BackupES           192.168.195.136(rw,sync,no_root_squash,no_subtree_check)
exportfs -arv
192.1658.195.138
vi /etc/exports
/BackupES           192.168.195.136(rw,sync,no_root_squash,no_subtree_check)
exportfs -arv
192.1658.195.137
mount 192.168.195.136:/BackupES /BackupES
192.1658.195.138
mount 192.168.195.136:/ BackupES /BackupES
Testing (On the client)
df -h

Then
add path.repo in /etc/elasticsearch/elasticsearch.yml
Vi /etc/elasticsearch/elasticsearch.yml
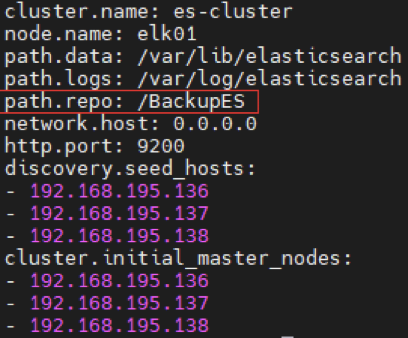
Then
systemctl restart elasticsearch
Kibana
Create Repository
A repository is where your snapshots live. You must register a snapshot repository before you can perform snapshot and restore operations.
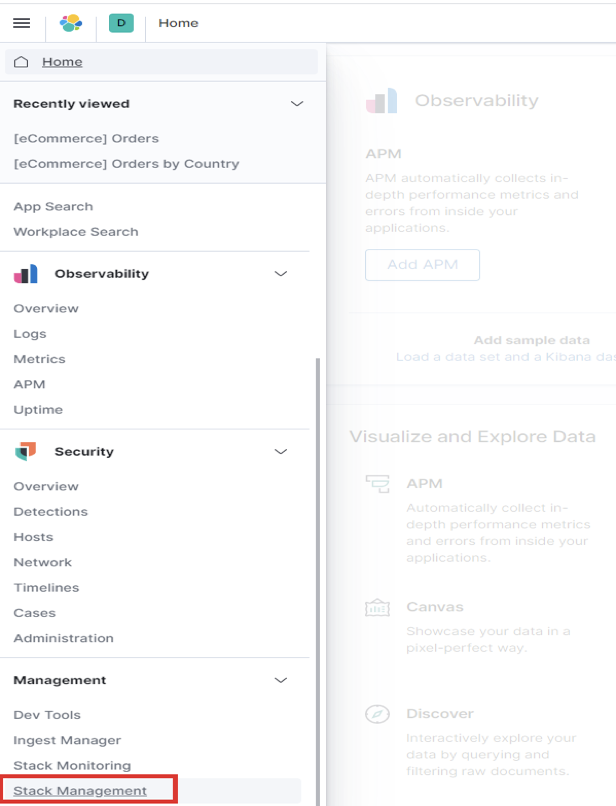
Menu > Stack Management
Snapshot and Restore
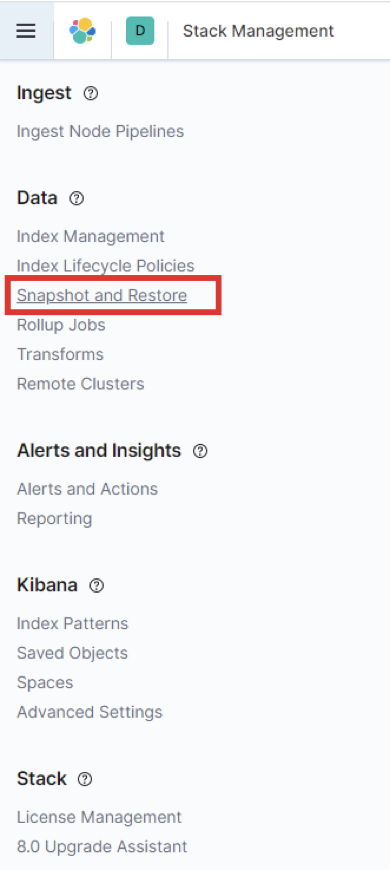
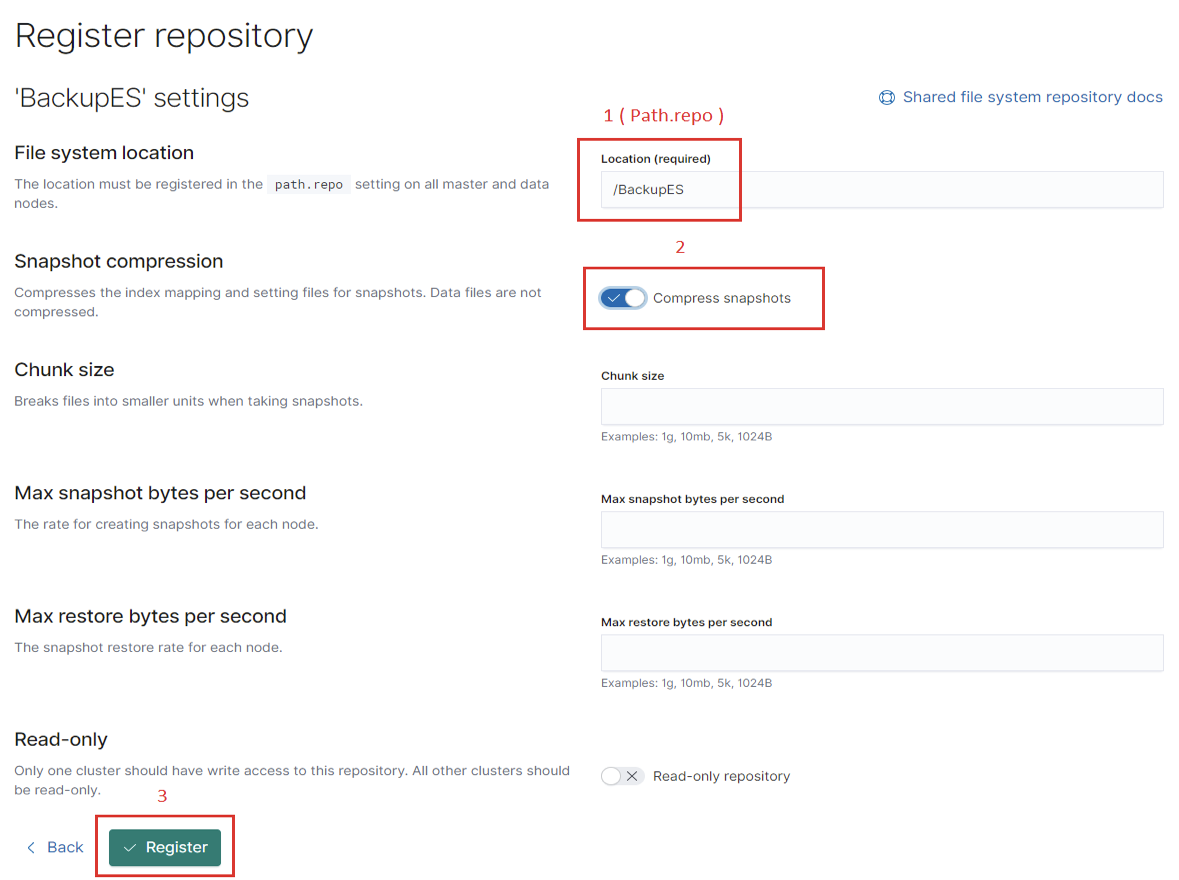
Repositories > Select Register a repository

Choose repository name and select shared file system
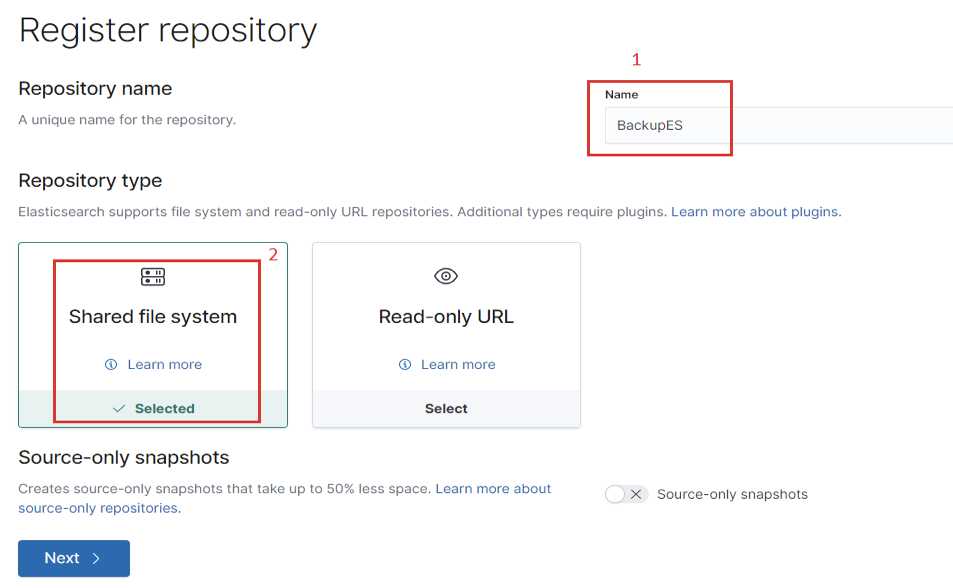
Note : You can compress snapshot (2)
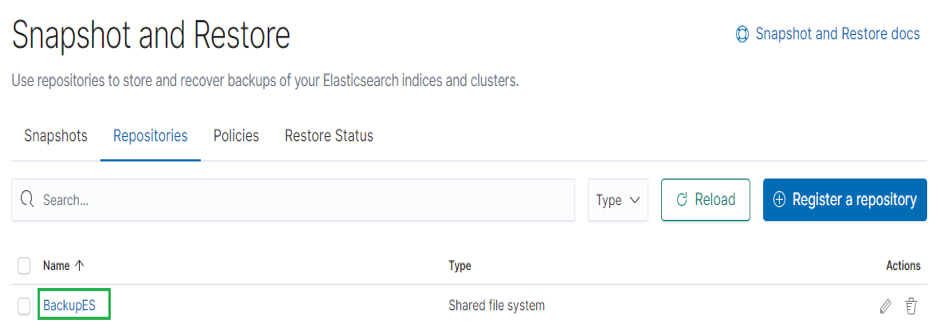
BackupES Repository Created
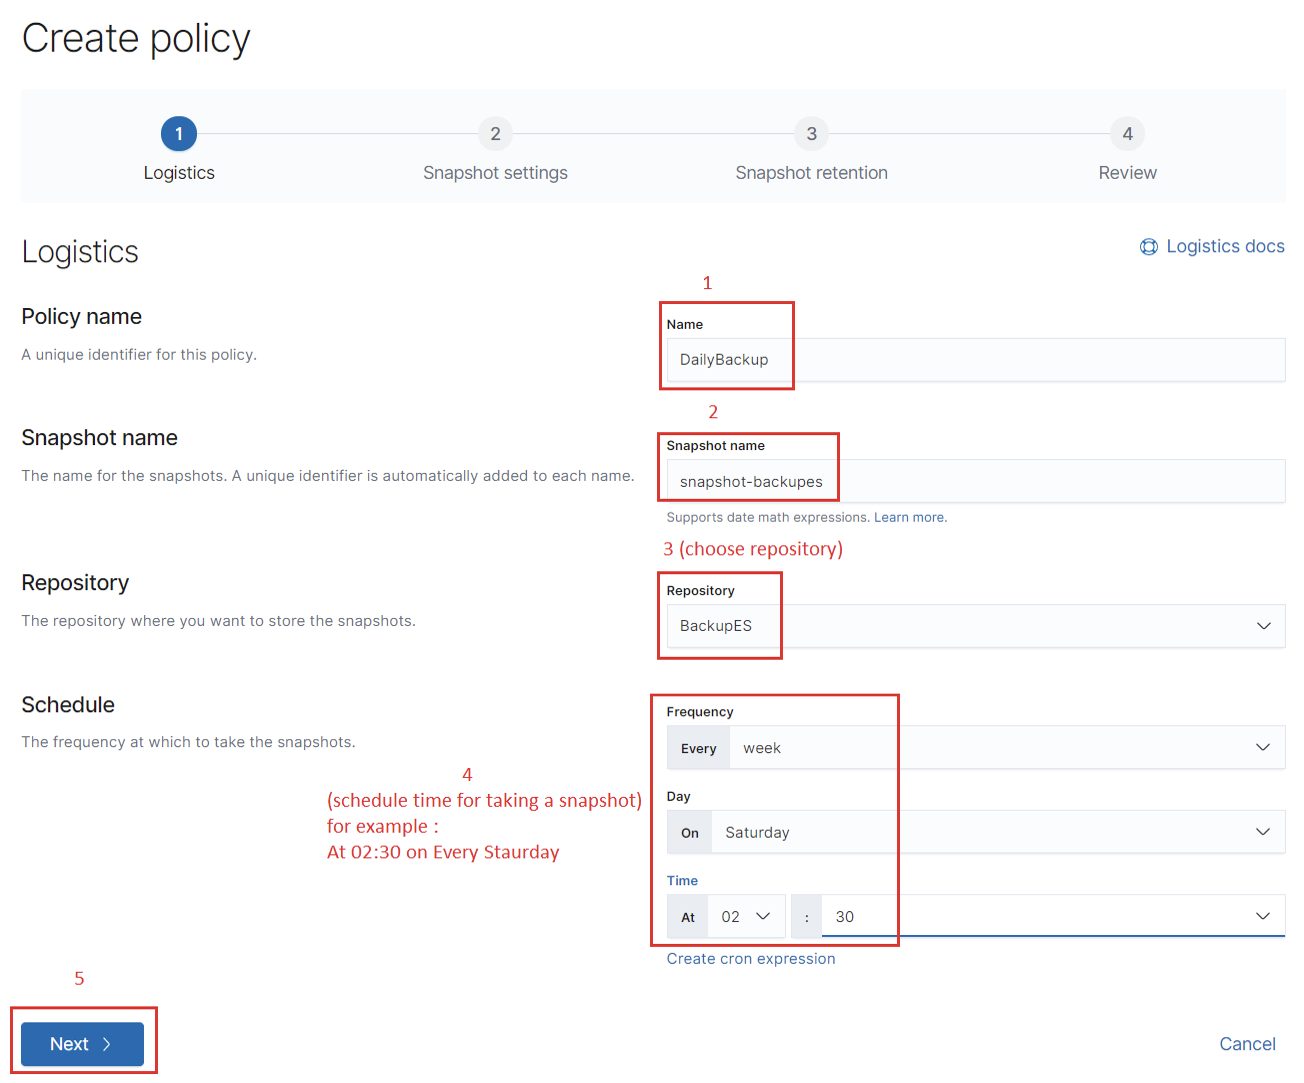
Create Policy
Use a snapshot lifecycle policy to automate the creation and deletion of cluster snapshots
Taking automatic snapshots

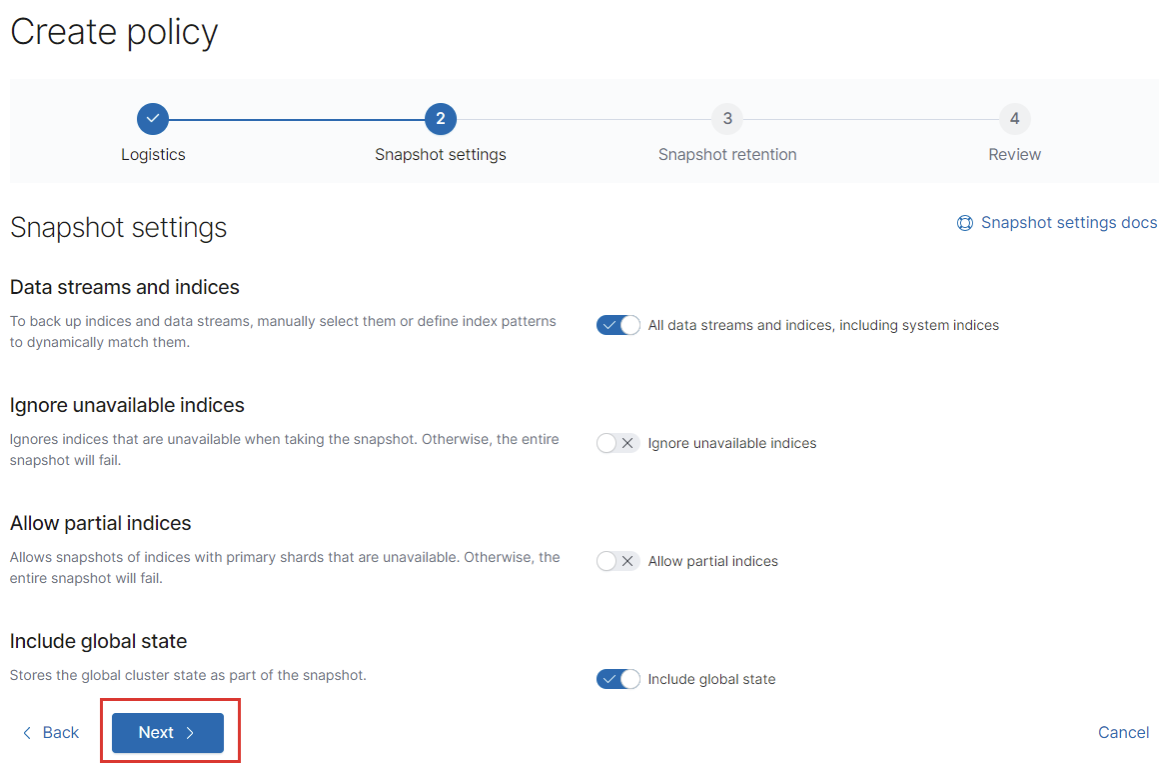
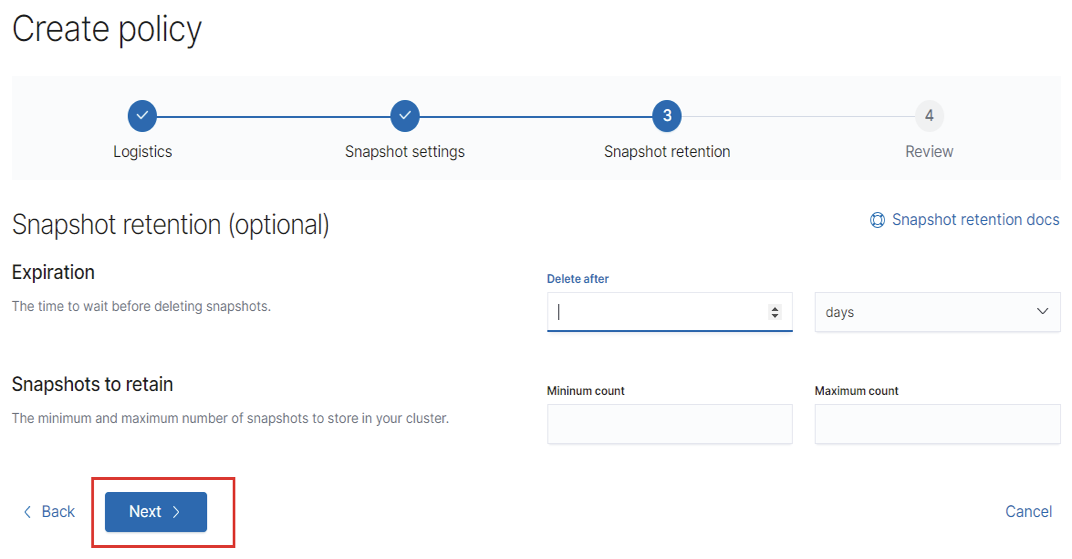
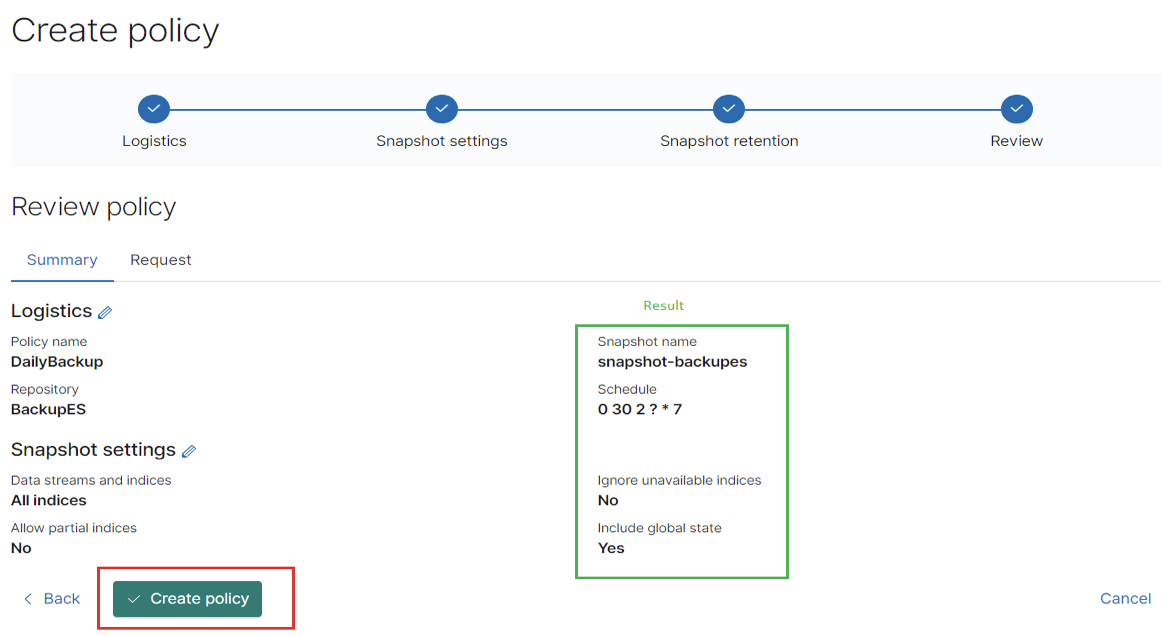
Daily Backup Policy Created

Take a Snapshot
You Can take a Snapshot for Test


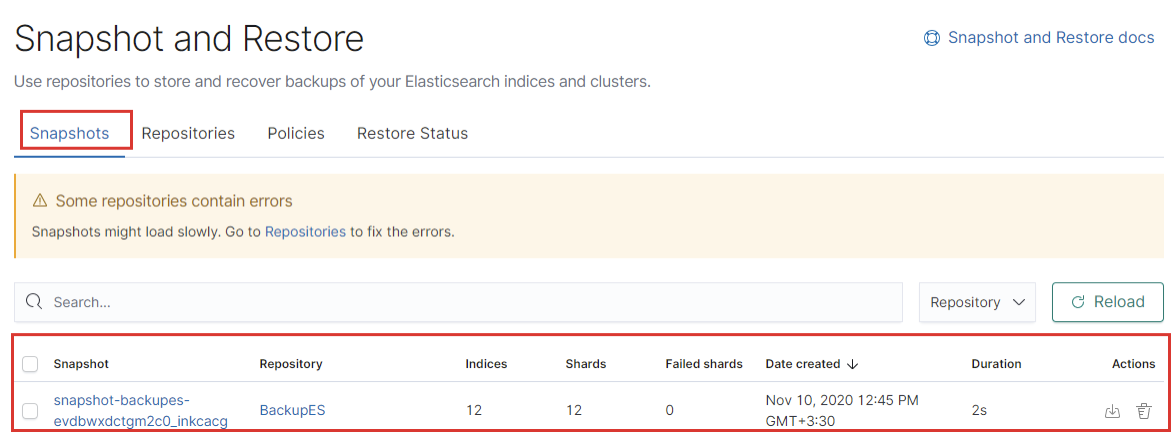
Restore Snapshot
Delete indices for test (DANGEROUS)
curl -XDELETE http://localhost:9200/mytest_index
curl -XDELETE http://localhost:9200/mytest_index2
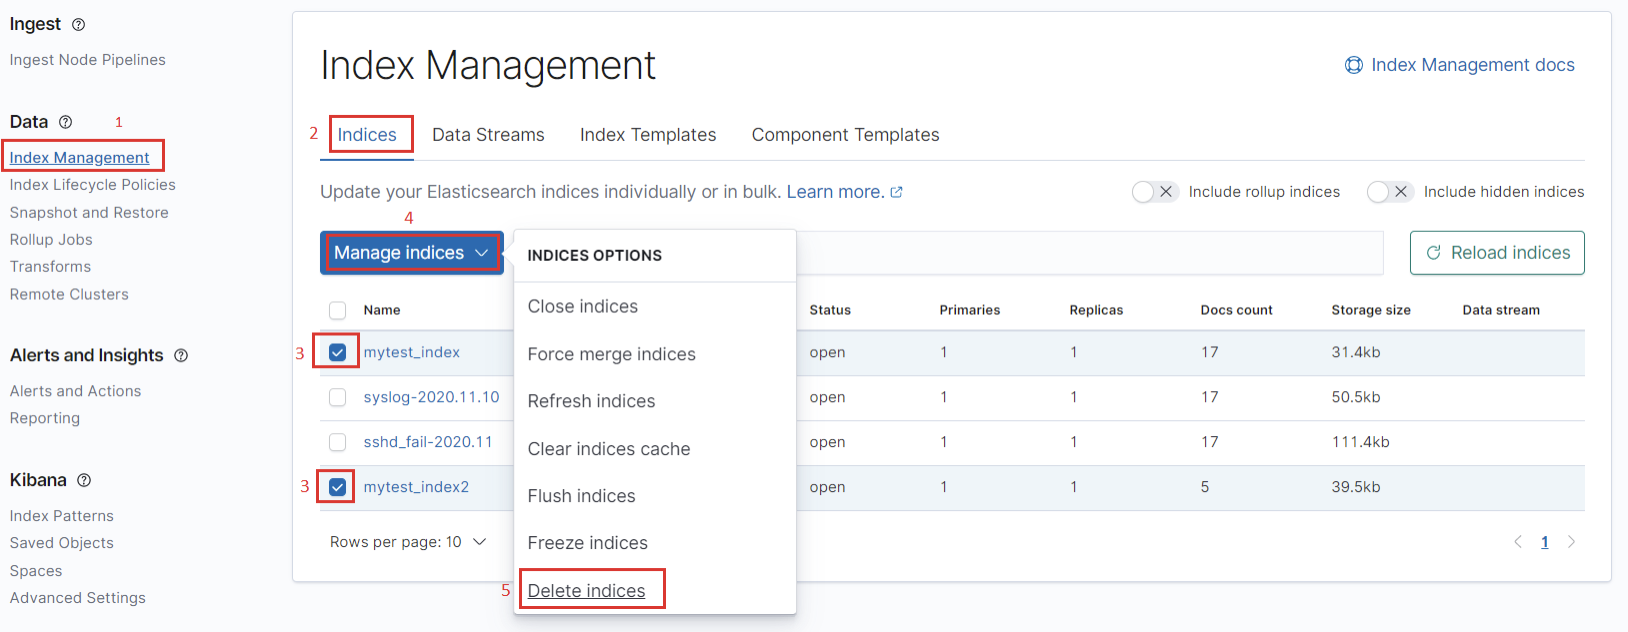
Then Choose Snapshot
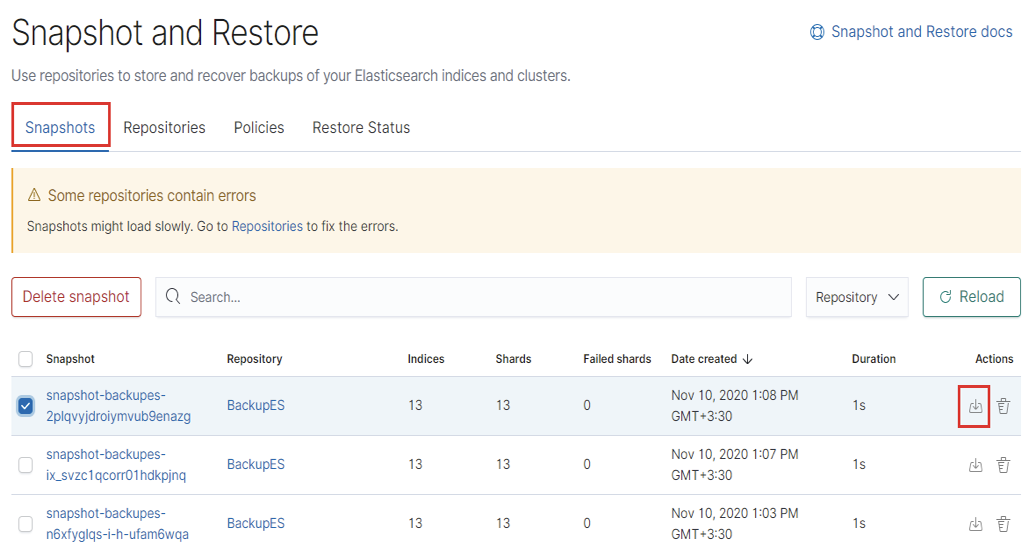
You can choose indices
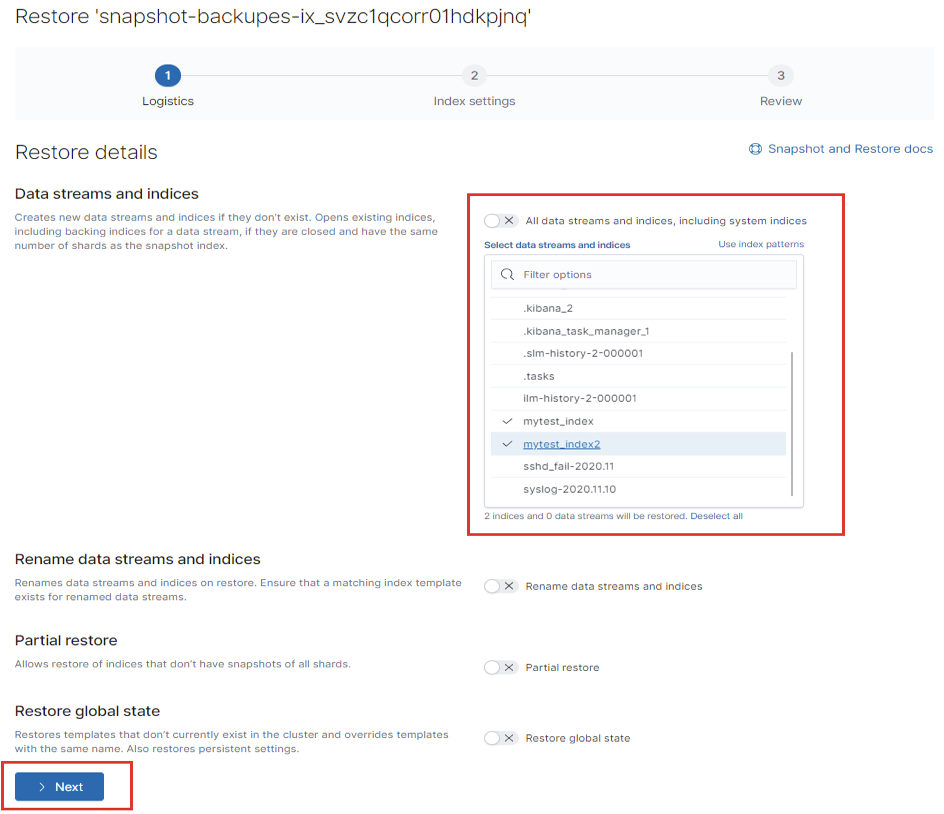
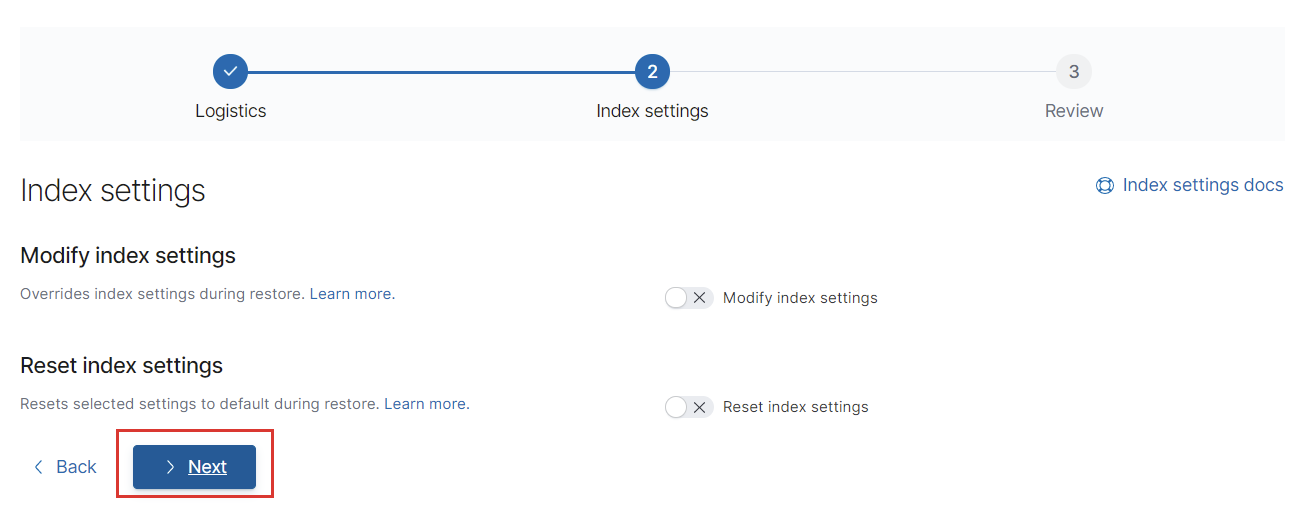
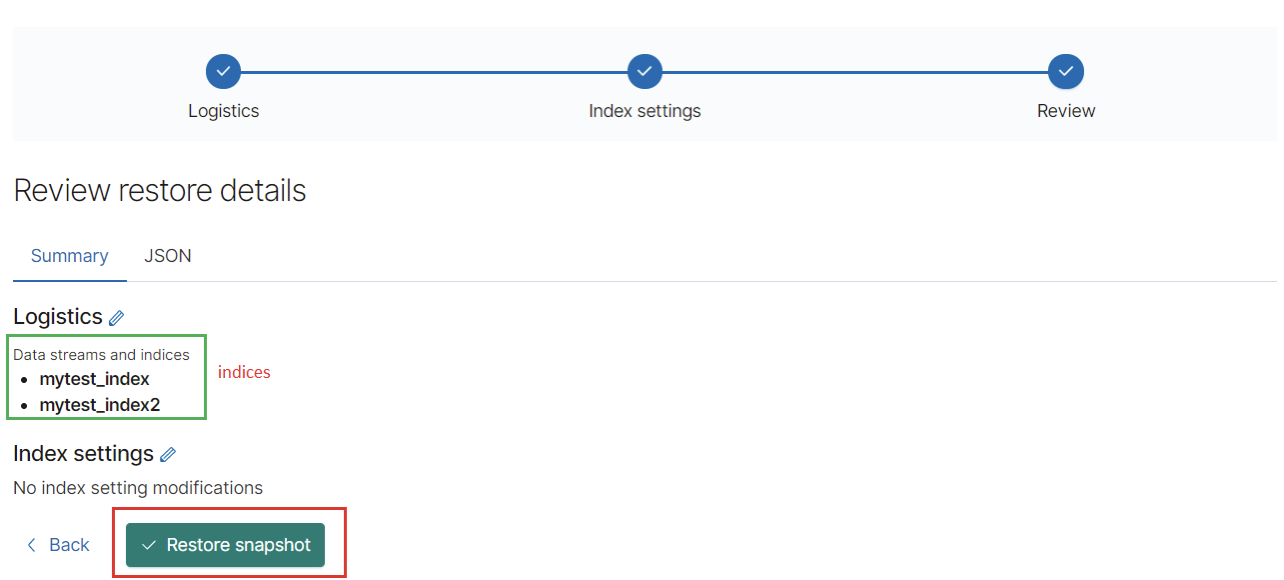
The result of restoring the snapshot (success)


دیدگاه خود را بنویسید